The Last of Summer…………….
These are the makes of last beach sewing stay away in February, what an age ago that seems now. I wish everyone well and strength in these unprecedented times.
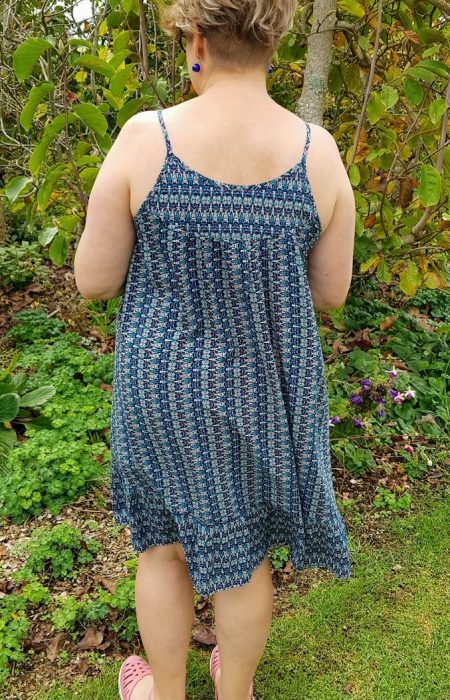
A little summer dress that I can throw on at the beach over swimwear or wear in the warm summer evenings is an essential wardrobe item for me. I self-drafted these slip dresses from a favourite falling apart cotton muslin slip dress that was on its last legs.


The original dress in cotton muslin was very soft and fell very close to the body even though the style was quite full. The floral aqua navy cotton voile behaved in a much stiffer fashion, and looked very tent like. To create a better fit I ended up removing 20cm from circumference of hem, so the dress sat closer to the body at this point, but I left the ruffle full.
The second dress is made from rayon, this fabric behaved in a similar way to the original I took the pattern from, so no alternations were needed.

I really like the back yoke detail on this dress. This detail gives stability and strength to fragile fabrics, holding the shoulder straps firmly together. The key design point I have found to keep straps from slipping off your shoulders with strap dresses, is how close they together and the angle they are set at. I am a pear shape, with narrow shoulders so notice this all the time. I have adjusted all my cami patterns too, I usually find for my size and shape that I need to move the back straps closer together to stop them slipping from my shoulders.
I like making the same pattern and experimenting with different fabrics, it gives interest to the outcomes. I made the cotton dress first and I loved it. I usually only sew cotton and linen based fabrics, so had nothing soft and floaty with me as I was sewing at the beach(I had pre planned all my projects). That’s when my sewing buddy Claire came in. She is the master of rayon, from the other side of the room she says “here make one in this” as a bundle of fabric comes swirling across the room. Hence the blue rayon, “THANKS sewing buddy”. Both these fabrics came from Spotlight.


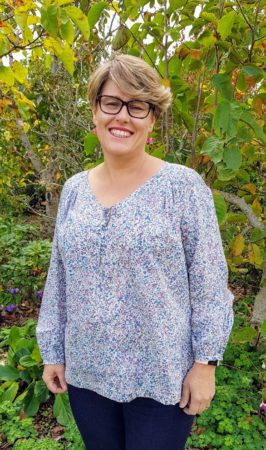
I have a whole lot of stuff I have started over the years and for one reason or another it takes alonnggg time to finish. It just seems to sit, this was the case with this shirt. All I had to do to finish was sew the buttons on. The fabric was a vintage piece of Laura Ashley I picked up at a op shop. The pattern Burda 7198(style A). I am a sucker for collarless placket shirts. I am still searching for the perfect one.
I find Burda shirt and top patterns on the whole a good fit for me. I am a size 48 in body and 46 neck and shoulders. Sometimes I need to do a bicep adjustment.
With this shirt I followed the pattern, the only adjustment I made was to remove the hip gusset, I didn’t need it, it looked as though I had wings on my hips, definitely an unnecessary addition. I was pleased with the outcome.
I have sewn from Burda Style magazine all my sewing life, the first outfits I made were in the 80’s as a teenager. Did I mention I love collarless placket shirts, well here is another one. This is style 103 from issue 5/2016.

Sometimes making something is an evolutionary process. That was the case with these shirts when I started them spring 18 months ago.
To begin with this pattern only went to a size 44 in the magazine, so I graded it up to a 46 shoulder and 48 body and did my usual bicep adjustment, but didn’t check any of the finished measurements. Oh dear…….
The outcome was they were way too big in the body and shoulder, and too short in length. So last winter I added a hem band of 3cm (1 1/4inches) to the magenta voile (Morelands Fabrics) and Liberty Tawa Lawn (The fabric Store)versions. I couldn’t be bothered at the time doing any other alterations. Now the length was good, but they were still very sacky.


Roll forward to my end of summer sew away 2020. I decided I really liked this shirt and wanted to make a couple more. BUT, I needed to adjust the previous ones before I made new ones. SO, to the two original ones, I reshaped from under the arms to the hem removing effectively 16cm. The shoulders I decided I could live with not sitting on the shoulder point. I didn’t realise just how voluminous the style was originally. Finally, when I made the first two I just elasticated the cuff, I didn’t like this. So lastly I decided to put a small cuff on the shirts.
A small note, I always kept the large scrapes from anything I make, I have a special bin that I keep these off cuts in, so if this kind of sewing mishap occurs I usually can remedy.
With the following 2 new ones I altered the pattern to a 44 in the bodice, and the body, lengthened the body and left the original bicep sleeve alteration.


The finished results, in cotton voile and a light cotton chambray(both from Spotlight).
Here is a hint for narrow cuffs on shirts. I tried unsuccessfully with both my sewing machines automatic button holes. The problem was the cuff was too narrow for the button hole foot to sit on and grip. As a result I made roulade loops, which are really cute, and are so simple to make.


What I have learnt from sewing these shirts is…. Always overlay the flat pattern piece with a garment you have that is a good fit before you start cutting out, this is a great check.
The next blog is in response to several requests for me to demonstrate how I make my homemade ironing mats that I use. Watch out for it shortly.
Happy Sewing
Catherine

If you would like to hear more from me. Click and Subscribe today!
Some things about me you need to know…..
I am obsessional, therefore I collect, and have collections.
I am passionate, I either love it or hate it there is no in between.
I am a perfectionist when it comes to sewing, and struggle with the just ok finish I achieve sometimes.
I garden. I collect plants too, especially deciduous magnolias.
I need colour and texture to nurture my soul.
I read, research, and study because it excites me.
I am a mum to three twenty somethings, an attendant to three cats, and partner in all things to David of more than 30 years.
